Monday, July 31, 2017

Cosplay Skills with Silk, Taffeta, and Satin fabrics

Leveling up your sewing skill IRL is a series of short articles with tips, tricks, and things you should know before working with different types of fabric. We hope these help level up your skill and save you some tears as well as time. Please refer to the XP requirement bar for the difficulty rating of each fabric.


Sewing with satin, silk, and taffeta can be very challenging. They are such beautiful fabrics and perfect for so many cosplays. There are a few things you should know before working with them that will save you some heartache, tears and most importantly time.

One of the first things is to make sure you are using the proper sized needle. Satin doesn’t “heal” around needle holes, so if your needle is too large you will have very visible needle holes as well as possible puckering from the fabric giving way. We wouldn’t recommend using very many pins on this fabric as it spreads apart the threads and can sometimes still be visible after the sewing is complete.

Secondly,you should use a short stitch while keeping your fabric taut and smooth. The last thing you want is puckering on your seam. If you are getting pucker on the underside of your seams you may need to switch to a smooth presser foot to keep it from grabbing the fabric too harshly.

When working with fabrics like these you want the least amount of seams possible, since the grain on the vertical seams can pucker over time no matter how perfectly you sew them. To help with this you can add a little interfacing to your seams, but experiment with it to see what works best for your machine.

If you found this article helpful, have questions, or have an article you’d like to see be sure to let us know in the comments below.

Sunday, July 30, 2017

10 Practical Cosplay Tips From the Amateurs


Cosplay is becoming more and more recognized as an art form. It’s even a viable occupation for the growing number of people who now make the convention rounds, with some gaining celebrity status as “professional cosplayers.”


At the same time, there are many cosplay shops offering high quality of costumes. For example: cosjj.vom

I applaud those who have brought this pastime into the spotlight. However, some part-time and beginning cosplayers may feel a little out of their league among these living, breathing photo opportunities—some of whom have spent thousands of dollars and countless hours in the gym perfecting their look.

To those afraid of how they will size up compared to the pros: Never underestimate the passion and creative mind of an amateur.

I recently spoke with several cosplayers at the Las Cruces Anime Days convention held every winter at New Mexico State University. The five-year-old event attracts a bevy of anime, manga, and gaming fans, many of whom arrive in full cosplay splendor to take part in manga costume contests, “pose-offs,” karaoke and dance competitions, a masquerade ball and dance, and cosplay, prop-making, and makeup workshops.

Some of the cosplayers have shared 10 of their own costuming tips, based on their own interests and experience, from saving money to keeping comfortable:

1. Stance is as important as wardrobe. “Look up different poses from the character and know your posture,” says Lorenzo P.

2. Don’t worry about perfectly matching every last detail. “Look at the ‘image’ of the character [not just how it looks exactly on page or screen],” says Julian F. “As long as you get the overall image, that’s what counts.”

animesmall
Experimenting with looks, using light-safe materials for props, and keeping it simple are just a few of the tips fellow cosplayers have to offer. Photo: Rick Tate.
3. Don’t go crazy with body makeup. “Less is best with makeup,” says Sonya G. “If you layer it too much, it will crack.”


4. Materials make the difference in prop-building. “To really get a good metal look, PVC pipe and silver paint works fine. I prefer PVC, because some conventions don’t allow certain types of metal,” says Adrianna B. “I’ve also learned bakeable clay is you best friend [in making props].”

5. Don’t try to always go too skintight. “Always buy pants one size larger than you actually wear,” says Ashlyn V. “Otherwise, it will be too tight and uncomfortable.”

6. Experiment. “Have fun and play around with your look,” says Katherine G. “I do my own makeup and make my hair [wigs]. Some things we make and some I buy.”

7. Don’t let details take the enjoyment out of dressing up. “Never be too nit-picky,” says Melissa D. “As long as you feel confident in yourself and what you’re wearing, that’s what matters.”


8. Expensive, commercial costumes aren’t always best. Look for places you can find items for less money. “If you don’t know where to start, go simple with singular pieces of clothing,” says Derek B. “I’ve even found some things for my costume at places like Goodwill.”

9. Take advantage of online resources. “Find your favorite character and see what you can find online,” says Joaquinn P. “YouTube helps a lot, and just look at different images—a lot of different images.”

10. Above all, you’re supposed to be having a good time. “The main thing is having fun,” says Jennifer B. “Find something you like and go for it.”

Saturday, July 29, 2017

Cosplay Tools 19 Sewing Hacks You Should Know

When you are making your cosplay costumes, the following tools would help you a lot.

1. Hem the easy way!
Print the hemming template to get a uniform and easy hem, every time.

2. Save money on thread!
Stop using the tiny cones of thread. Use a mug to house your giant cone of thread.

 3. Sew buttons on with your sewing machine.
Stop hand sewing buttons.
 4. Use rubber bands to keep a uniform seam allowance.
 5. Store bobbins in pedicure toe separators.
 6. User washers as pattern weights.
 7. Use two pencils to add a uniform seam allowance.
 8. Use a regular sewing machine to sew knit fabric.
 9. Use the cheater method for gathering fabric easily.
 10. Use a pin to get your buttonholes right every time.
 11. Use a bodkin to insert elastic into a casing.
12. Print a bias tape template.
 13. Learn how to lengthen or shorten anything.
 14. Learn how to use elastic thread
 15. Learn how to make continuous bias tape.
 16. Keep your scissors sharp.
 17. Grade a pattern larger or smaller to fit.
 17. Save the skirt length chart.
 19. Never get frustrated threading a needle again.
18. Cleaning tricks to keep your iron clean.

Friday, July 28, 2017

Cosplay Tips: The Benefits of networking

Knowing some cosplay tips would help you a lot 

Today’s edition of “Cosplay Tips” is a little different from most. It doesn’t follow a list, or a “how-to” kind of model. Instead, I’m going to give you a little tip that has worked out wonderfully for me several times–build a network of cosplayers.

Now, this network can comprise of those “professional” cosplayers, as well as your own internet friends of acquaintances that cosplay as a hobby. If you are going to include the pro cosplayers, though, you should recognize that you won’t always get an answer, and will never get unsolicited help.

“But Amanda!,” I hear you say. “Networking is so boring!” You’re right, it can be pretty dull. But it’s also a really, really valuable source of information while cosplaying. Also, Twitter and Tumblr make it ridiculously easy to build an informational and instructional structure.

I spend a good amount of time researching for my cosplay enterprises. Not only do I grab as many reference pictures as I can (which I talked about in my article on cosplay planning tips), but I spend a ridiculous amount of time researching different methods of building props, sewing techniques, fabric recommendations, and materials. Even with all the research I do, though, I wind up with questions. Sometimes that questions are so minor that I feel like I can go forward by myself. Sometimes, though, the questions make me too insecure to delve into the construction phase.

In such a case, I will pose these questions to other cosplayers. If I know that someone worked on a similar costume or use a similar technique, I will ask them directly. If I don’t know anyone, I will put out a random tweet or pose the question on Reddit (check out r/cosplayers for what I think is the friendliest community). Sometimes, just discussing varying approaches to cosplay will prompt helpful input from other cosplayers!

If you do not want to make costumes by yourself, please visit our website: Cosplay Costumes , we have several talented designers and tailors and years costume production experience.

Thursday, July 27, 2017

Dyeing Suede Nubuck

When we make our own costumes, we need to know some Dyeing Suede & Nubuck tips.

Dyeing Suede & Nubuck

Dyes are great at returning suede & nubuck back to new. We have a range of colours available.  The colours vary in shades and the original colour of the shoe plays a part in the end result. So it's important to note that often you cannot determine the exact shade of colour until completion. When choosing your colour remember that you can only dye from light to darker colour.

To get started follow the steps below.

STEP ONE: PREPARING
Brush the surface with a Suedette Brush to remove dirt and to bring the nap up.
For dirty shoes view full cleaning instuctions in the Suede & Nubuck page.

STEP TWO: DYING
Use the brush provided with the Suede Dye and apply the dye in long, even strokes. Make sure that the colour remains even.
Let the first coat of dye dry for 1 - 2 hours.
Apply second coat until you achieve the desired shade.

STEP THREE: BRUSHING
Allow to dry thoroughly, and then use a Suedette Brush to bring the nap back up.

Shoe Dying Tips
The more time you spend preparing your shoes the better the results will be.
Each time you apply dye to your shoes make sure that they are completely dry before applying next coat.
Stuff paper in your shoes or place them on a shoe tree for easier application.
Try not to apply to many coats as this can dry the leather out.
Red suede & nubuck can sometimes be very difficult to dye, even to black. Not sure why this is, it may have to do with a proccess used in the tanning of red suedes.
When choosing your colour remember that you can only dye from a lighter to a darker colour.

Ironging:
For most materials, we could use iron to flat the costumes.

Winter Solider Metal Arm Tutorial


How to Make Mei's Belt from Overwatch?

Need to make a belt that's simply a-mei-zing? We've got you covered.

My Mei cosplay debuted for the first time this year at Blizzcon 2016. I should have taken a lot more photos during the assembly process of Mei's belt, but hopefully, this helps someone. Please ask me any questions you may have in the comments below! In order to get the proper sizes, I used Photoshop to overlay Mei's photo onto a photo of myself holding a ruler. This gave me approximate measurements, sizes, and scaling for everything that I needed to make.


Foam Pouch Base

I started off with the basic size I wanted for my pouch. I made a simple pouch with a flap from 8 mm foam. As you can see in the second photo, I didn't like how the top looked. It was cracking from being opened/closed and it was standing up too much. I decided to just cut the foam flap off, and make a flap out of the vinyl I purchased to cover them in.


Vinyl Flap and Covering

I made the flap out of outdoor vinyl and stitched on the details. I also roughly covered the rest of the pouch in the same vinyl, attaching it to the foam with Hot Glue. Hot Glue probably wasn't the best choice, but I was working with what I had at the time. I folded over the edges to give it a clean look. When gluing this, avoid trying to glue the finished sides of the vinyl together because they won't hold very well. If you're going to use something to keep the pouches closed, you should attach this now. I didn't think about it until it was too late and I had to hot glue velcro onto the pouches.


 Weathering and Painting

Using Oil Paints and a makeup sponge, I started weathering the back of the pouches and around the edges. I used an iridescent blue fabric paint for the blue strip on the front of the pouches. It took a few coats, but it came out looking amazing. I weathered over the blue a bit afterwards to make it blend in a bit better.


Sealing, Attaching the Flap, and Mod PodgeI made all 3 pouches and started to weather them. Once the back was dry, I added Matte Mod Podge to "Seal" the Oil Paint. After that dried, I added Chicago Screws (using an awl to punch the holes) to make sure the fabric flaps would stay attached to the foam pouch with repeated opening and closing. The lines you see on the back are me finding the center of the pouch so I can line it up with the belt when attaching the pouches later.

Why Mod Podge? I coated the entire belt with Mod Podge to seal it because I knew it would wear, chip, scuff and add to the weathered look. Also, if too much chipped off, it would be easy to repair and repaint.


Belt Base

Once the pouches were all made, I started working on the actual belt. After measuring it to my size, I used 8 mm foam for the base and then added 6 mm strips to the top and bottom for detail. I then made the front flap and canteen holder which I (unfortunately) didn't take photos of.
 Attaching Front Flap and Covering Belt

I glued one side of the vinyl that will cover the belt itself down along the very edge. That would have been difficult to do after attaching the front flap. I attached the front flap and canteen holder with Chicago screws, and then glued the belt vinyl over top to hide the Chicago screws that were holding the front flap on.
 Attaching Pouches to Belt

I used Chicago screws and an awl to punch holes through the belt and pouches to attach them. I attached Velcro to the pouches with hot glue to hold them closed. I should have sewn them on, but I didn't think about it until it was too late.

 Creating the Canteen

I carved the canteen out of 10 mm foam layered and glued together. I used 3 mm foam to add the small details like the circle on the front and the black grips along the sides. I sealed it with a few layers of wood glue and sanded it smooth. I then painted it with a few "Pearl" acrylic paints to give it a frosty metal look.
Attaching the Canteen

I used Chicago screws again to attach the canteen straps to the belt flap and then one to close the straps around the canteen.
Making it Wearable

I used plastic clips on and webbing straps to close the belt in the back. I ended up having to hot glue the clips flat so that it stayed in place. Be careful if you decide to do this, because you don't want hot glue to get inside of the clips so that they don't clip together. It wasn't the prettiest, but it stayed put without an issue for two days.
The Finished Product

This is what the belt looked like completed. I hope this was helpful to anyone wanting to cosplay as Mei, or anyone that just needs help with a belt. If you are also interested in this, please contact me. Also if you want to buy more costumes, please visit my website: cosjj.com

Wednesday, July 26, 2017

Cosplay Start Tips:Planning your costume

We always need to know what we want to do. And when we do something, we need to plan it well.

It’s love at first sight. You see it, you need it, you want to make and be inside that wonderful outfit. You love the character, you love everything about their costume and you’re ready to to get elbow deep in fabric, silicone, latex, Worbla whatever to make sure this beautiful vision you see becomes a reality. You stare at photos online, dreaming of what it would be like to put on those wings and show your love to the world.

It’s so easy to get excited and get lost in the process that things don’t turn out quite as you planned. Maybe the fabric isn’t right or it doesn’t fit how you wanted. You are convinced evenly distributed spray paint is a thing of myth. You’ve cried more times over something going wrong, and you have 2 days before you leave for the con, and you just cut two left sleeves out of your last bit of fabric. Or your clear coat won’t dry, or accidentally bleach half of your perfectly dyed fabric cleaning the washing machine…

I get it. I mean, I reeeallllyyy get it! Through trial and error, and working in a deadline focused industry, I’ve learned over the years how to properly plan a large project, and no project is larger than a cosplay (not true, but it feels that way).

Planning a costume is the most fun! I plan more costumes than I could manage to possibly make. It’s a process full of possibilities and excitement! And if you’re anything like me, you love finding out everything you can about the character, costumes, materials needed and reverse engineering how something might go together. But I’m no fool, It can also be really daunting if you’ve never done it before. Here at Seams Geeky we try to take as much confusion out of the process as possible. That means lots and lots of research and planning, including calendars and budget sheets.

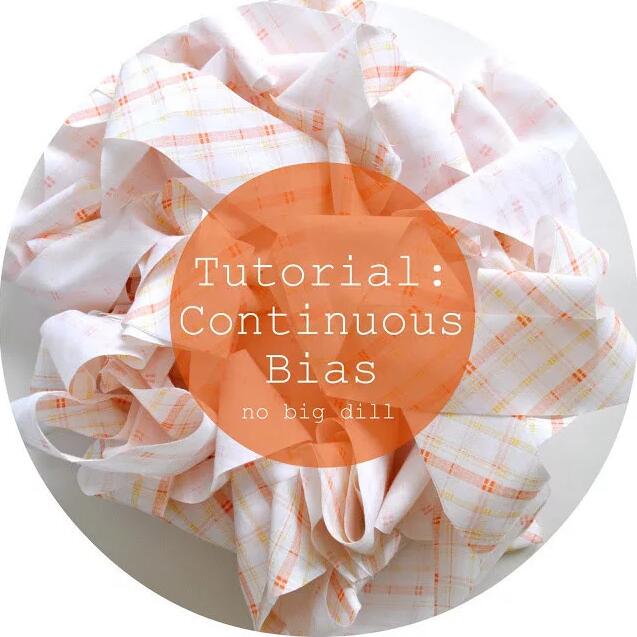
Ok, first things first. You bought your con tickets and hotel a year in advance, and now you just need to figure out what to wear!

Figuring out what costume(s) you want to make
Dig through your files (or pinterest boards), meditate, search your soul and determine what costume or costumes you want to make. Gather them all! Then start sorting through all of them and narrow it down.

First: Evaluate skill level.
This isn’t the end-all-be-all but you need to start with what you are comfortable with. Making a costume is great because you learn SO much each time you make something. What skills do you already posses? What skills are you confident in? What fabrics are you comfortable using?

Next: What skills do you want to learn?
Want to work with Worbla but never had before? Great! Never made a petticoat and want to learn? Fantastic! The best part of running into battle (and I consider every costume a battle) is it’s a trial by fire.

But you have to have time to learn. You’re probably not going to get it right the first time, so onto part 3:

What is your time line?
Do you have a whole year to make one costume? Do you have 2 months? Do you feel confident that you can learn what you need to in time, or will you be slapping it together at the end?

Now this one is optional: Think about your body image.
It’s a tough subject to talk about, especially with cosplay, so I want to be clear that I’m not saying throw out costumes because you’re worried you don’t have the same proportions. Screw that nonsense, wear what you want! What I’m saying is: If you think you need to lose 20 pounds before you can wear the cosplay, you should lose the 20 pounds (or be well on the way to losing it) before starting construction.

Tip sparkle rightI try to emphasize this with any custom garment I make:
A body can change a lot, by building muscle, by losing fat, so once you start making your costume, try to stay the same weight. The last thing you want is to have to take in 2 inches because now it doesn’t fit right. That’s a lot of last minute stress you don’t need.

I was talking to a client the other night about a costume, and she mentioned she wanted to lose some weight and I had to let her know that her costume would take about 2 months to make, so come July, she has to stop losing weight and stay the same size, otherwise she’ll risk the costume not fitting.

And finally, what is your most favorite that you HAVE to make right now? Because it’d be nice if the world was all puppies and rainbows and we did everything by the books, but sometimes passion completely wins out!

*Drum roll please*
My 2015 Cosplay list I put together the end of last year with a focus of getting several complete for DragonCon. Here’s why I chose each one per my narrowing parameters:

I’ve done a decent amount of comic cosplays in the past, and I was trying to diversify a bit this year. I originally wanted to do 1 Comic Character, 1 anime character, and 1 Video Game character. Cover my trifecta of geekiness. Somehow, though It ended up being very anime heavy. I don’t mind this, because anime is my FAVORITE, and it’s how the cards of fate fell.

Deadpool is loved by most people. Deadpool costumes
Why is that? I NEED TO MAKE IT. The second I saw Glenn Close walk on screen in the uniform, I knew it was destiny. That’s a #5. But I also know I can accomplish it. There’s going to be some pattern drafting, a little bit of molding and casting (enough to learn from, but not too much to feel overwhelmed. And if need be, I can do some last minute foam pieces), and I have a friend who’s going to style the wig. DONE!